DIY | Makeup Stocking Stuffers
I love giving stocking stuffer gifts! We don't trade large gifts at my Dad's family Christmas, so I take great pride in scouring clearance sections throughout the year or just thinking up creative DIYs that will fit in our stockings. Recently, while walking through a kitchen aisle of a store, I realized that silicone trivets look a whole lot like those awesome makeup brush cleaning mats everyone is using. So, I decided that would be a perfect addition to the gifts for the girls in my family. We ALL use makeup brushes!
When you give a gift that someone may not understand what it is at first sight (these just look like square pieces of silicone), it's the perfect occasion to come up with a cute tag to go along with it. I'm not a graphic designer by trade and I can't really make awesome graphics from scratch, so I always get a little help from stock sites like GraphicStock.
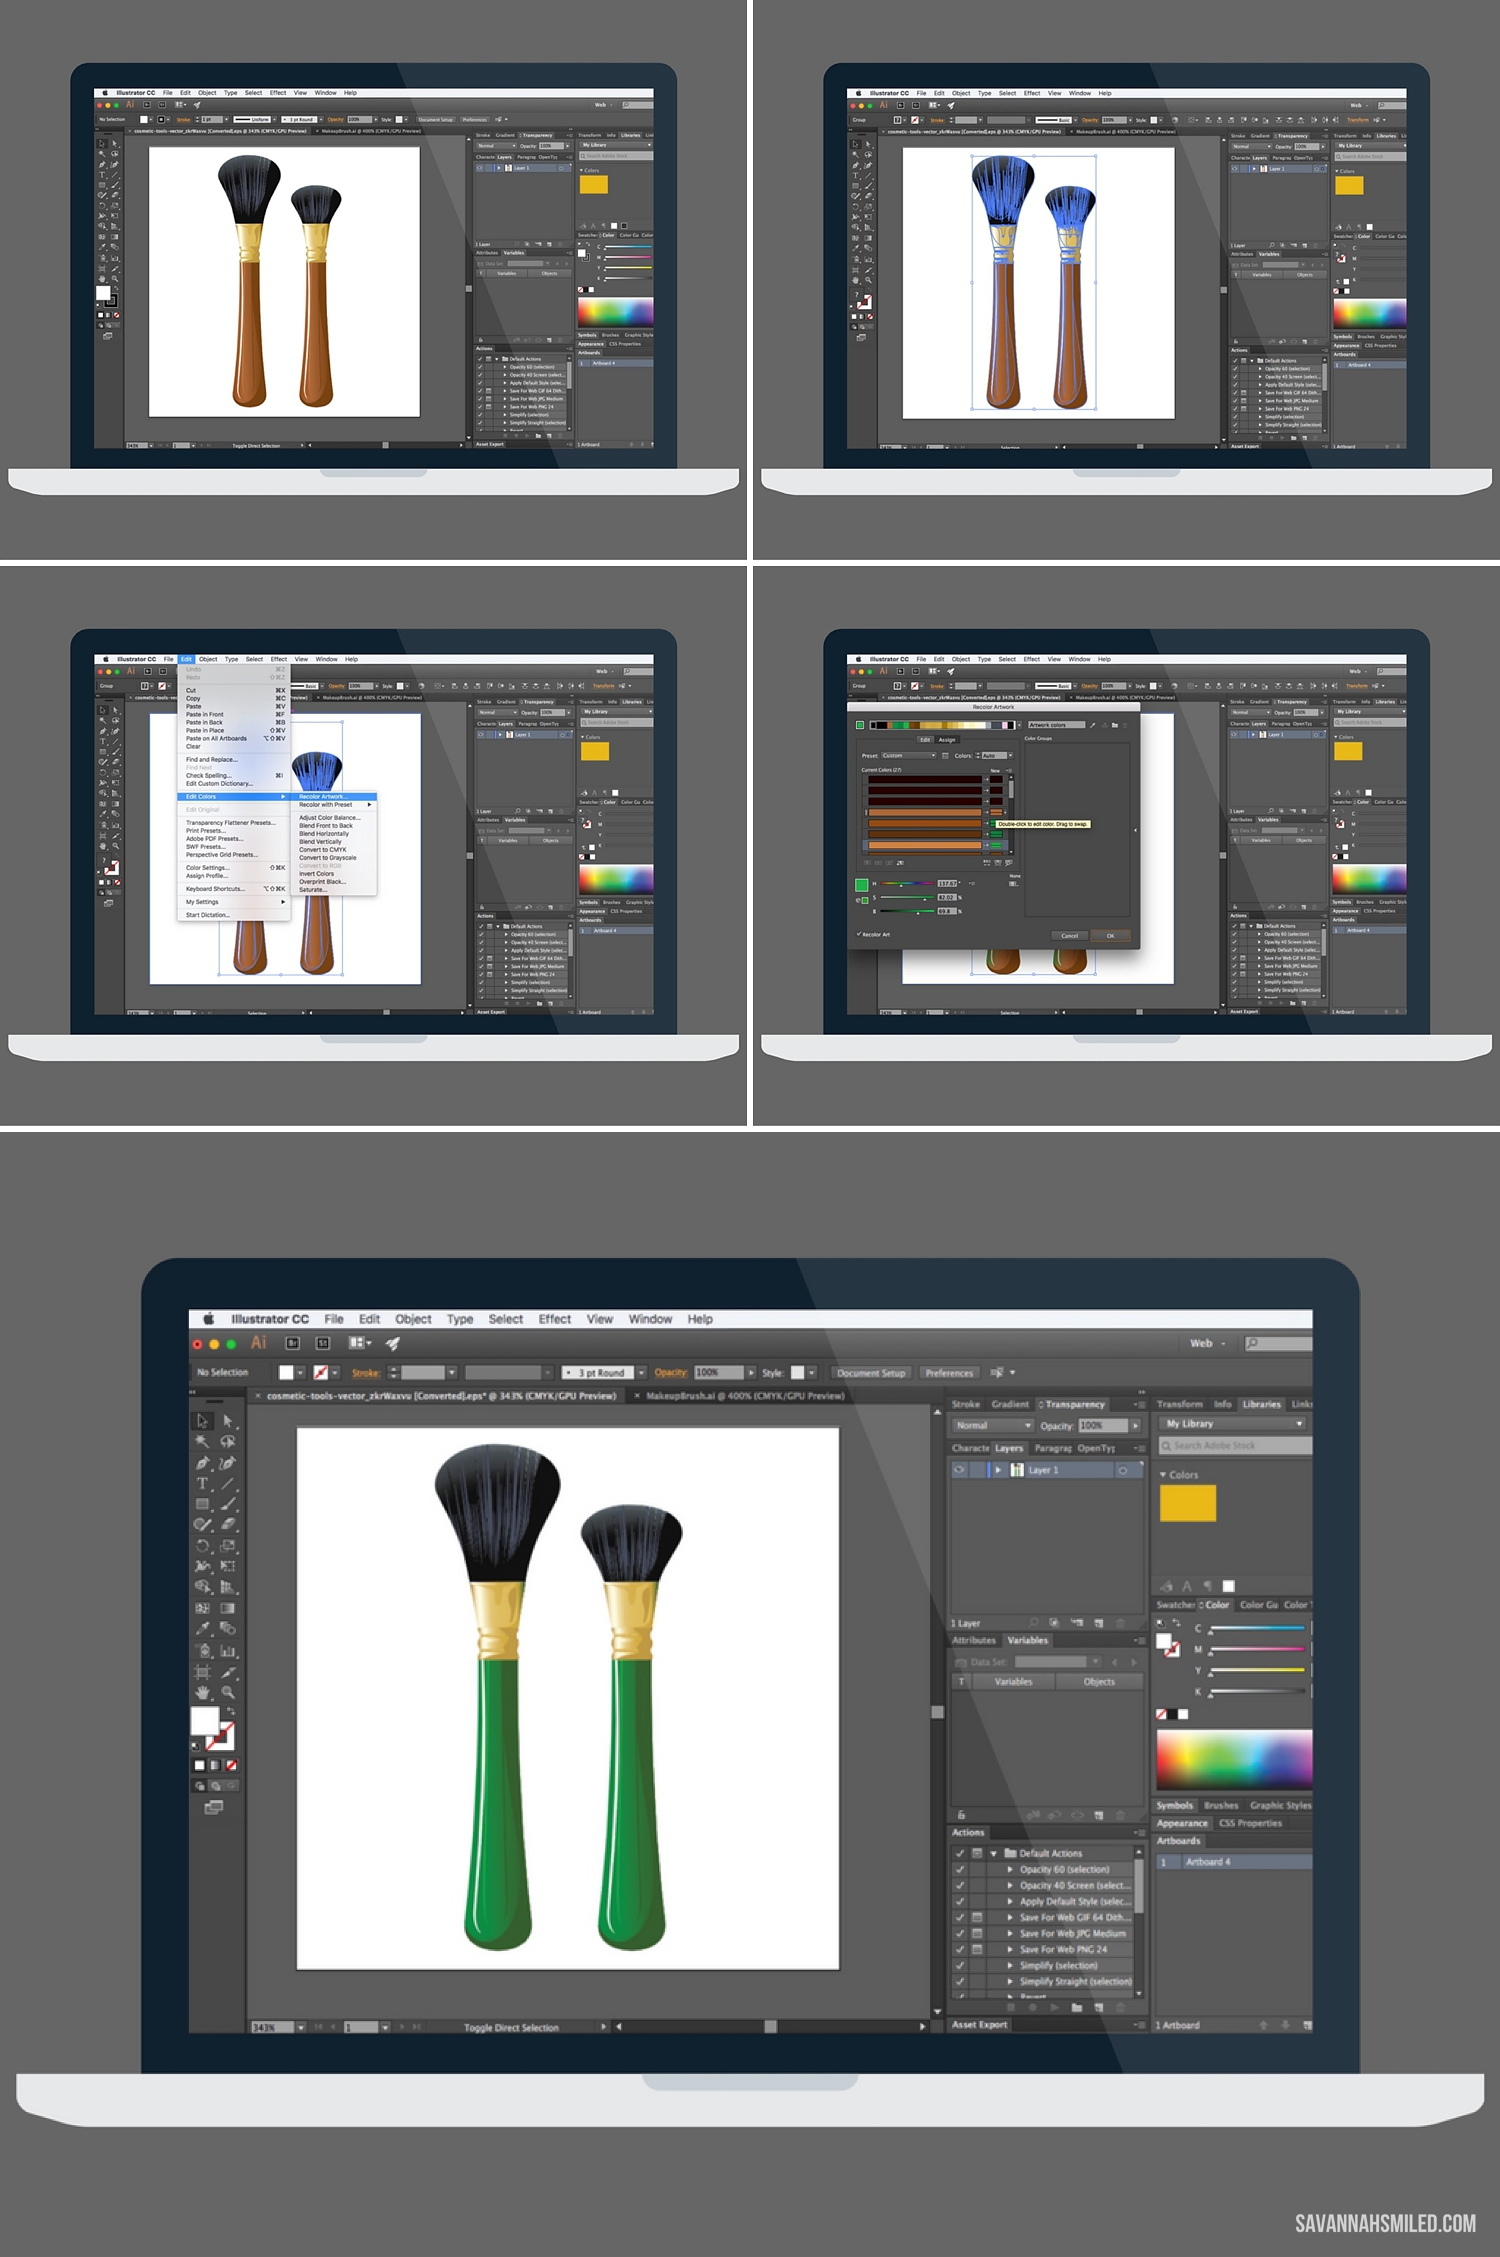
GraphicStock has a library of 250,000 graphics, images and vectors, so I knew I'd find the perfect set of makeup brush images for this project! To begin my design, I typed in "makeup brush" in the search bar on GraphicStock. I browsed around and found the perfect pair of brown makeup brushes. I downloaded the EPS file (which means many pieces of the file are editable, unlike a flat PNG or JPG).

To make these makeup brushes become a part of holiday gifts, they needed to look a little more festive. For this, I used my favorite little tool in Illustrator - "Recolor Artwork."
1. After downloading, open up the EPS file in Adobe Illustrator. 2. Use the selection tool to select the parts of the image you want to recolor. In my case, I selected the full images. 3. Using the top toolbar, select "EDIT," "EDIT COLORS" and "RECOLOR ARTWORK." This will bring up a color box with all the colors in the images. 4. I'm recoloring all the brown to become a festive green, so I went through the color list and added a green hue beside each of the brown hues. 5. Select "OK" when done and now my plain makeup brushes are a Christmasey green!
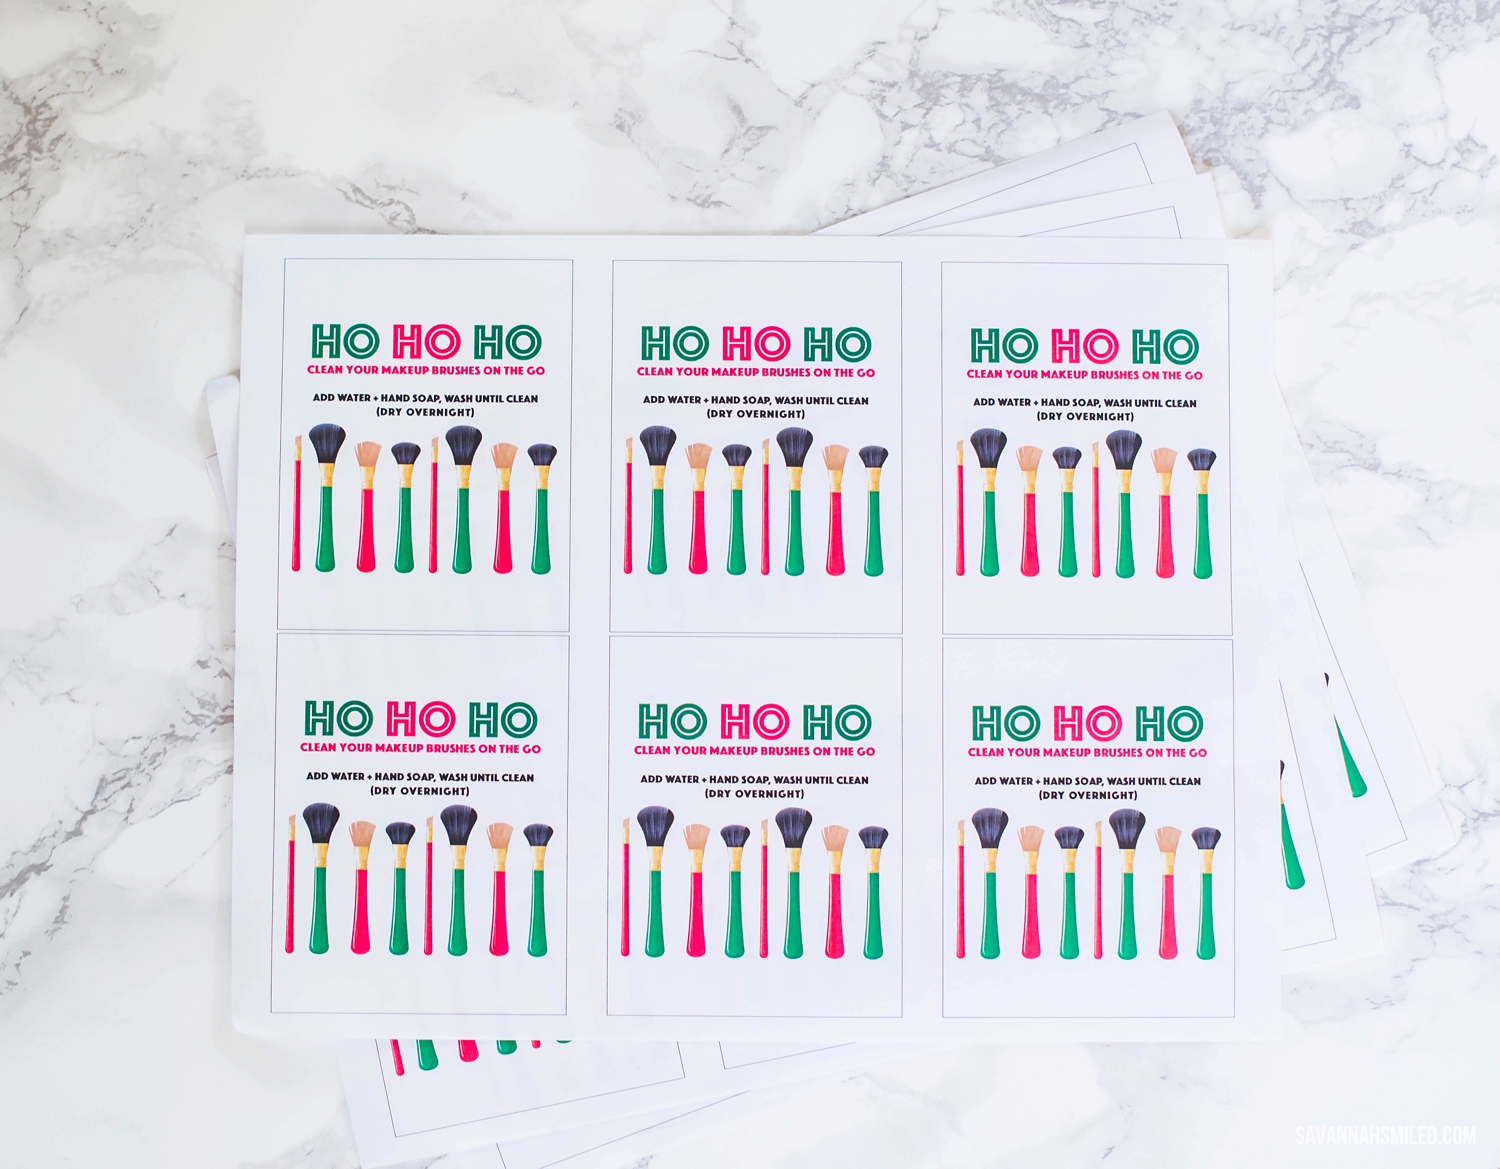
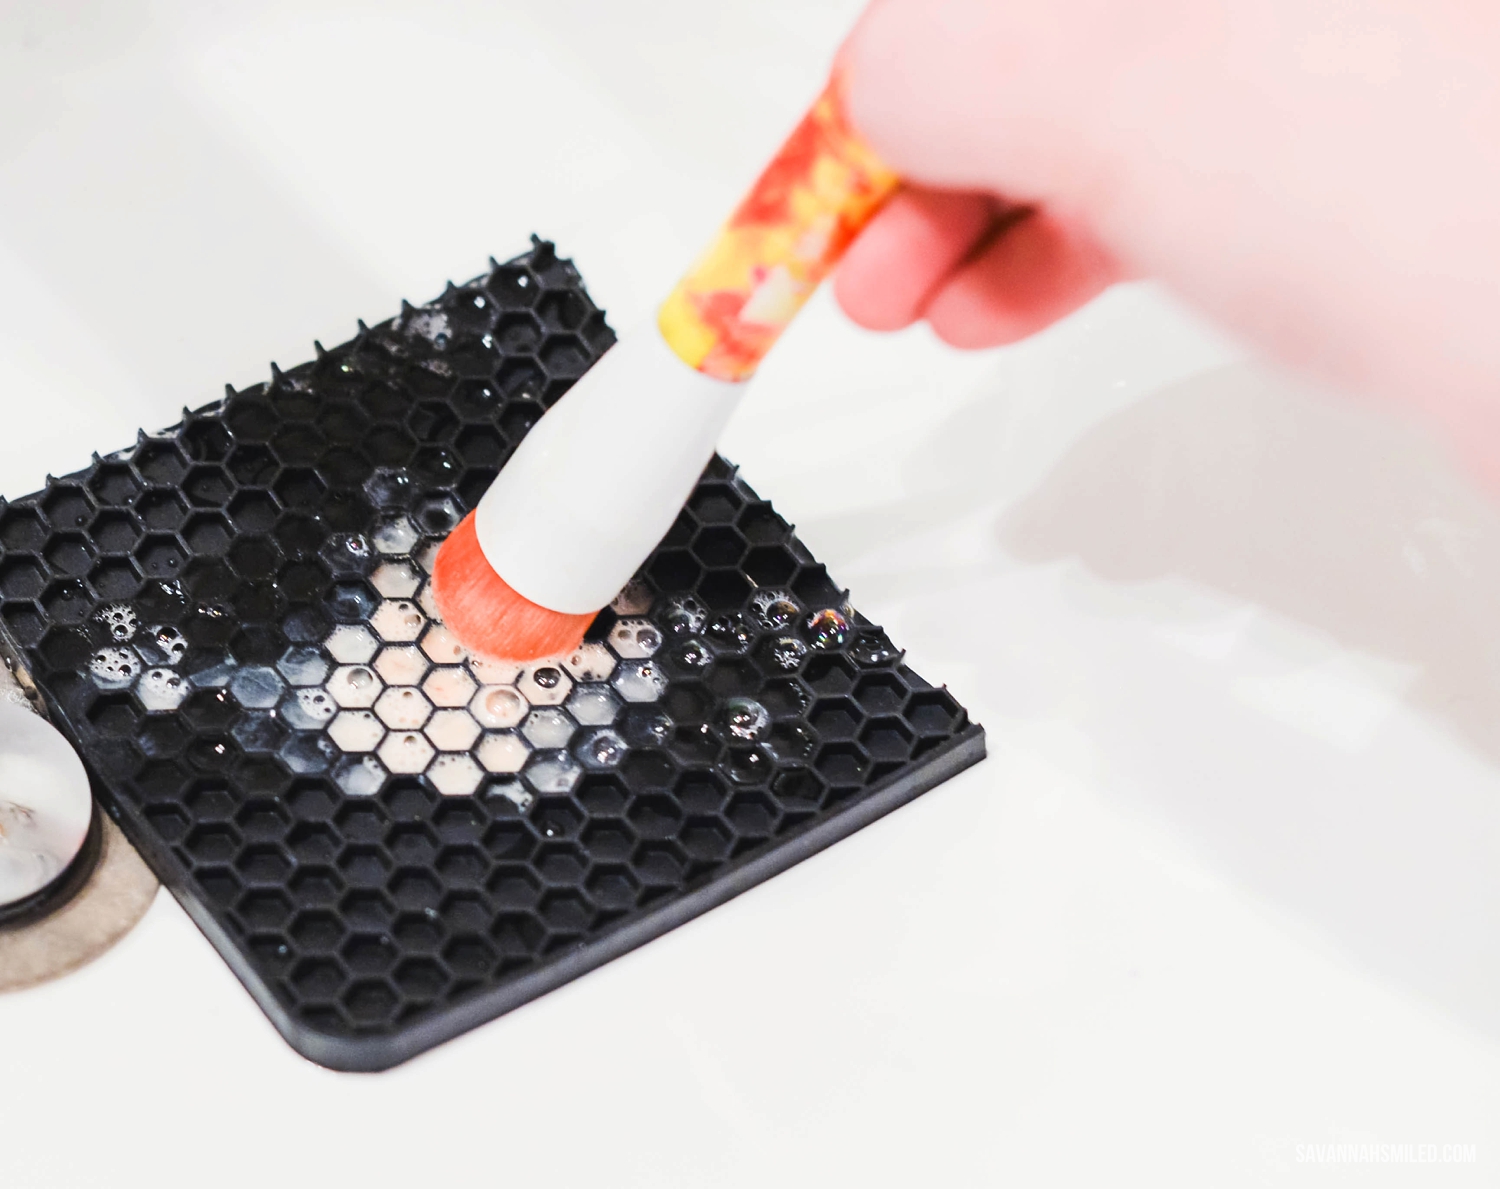
Using another graphic of brushes from GraphicStock and turning them red, my tags started coming together. Once I had the graphics the way I wanted them, I added the text to explain these gifts - "HO HO HO Clean Your Makeup Brushes on the Go. Add Water + Hand Soap, Wash Until Clean (Dry Overnight)" It's a festive saying, combined with some "directions" on how to use these brush cleaners. Now that the design was done, it was time to put the gifts together.
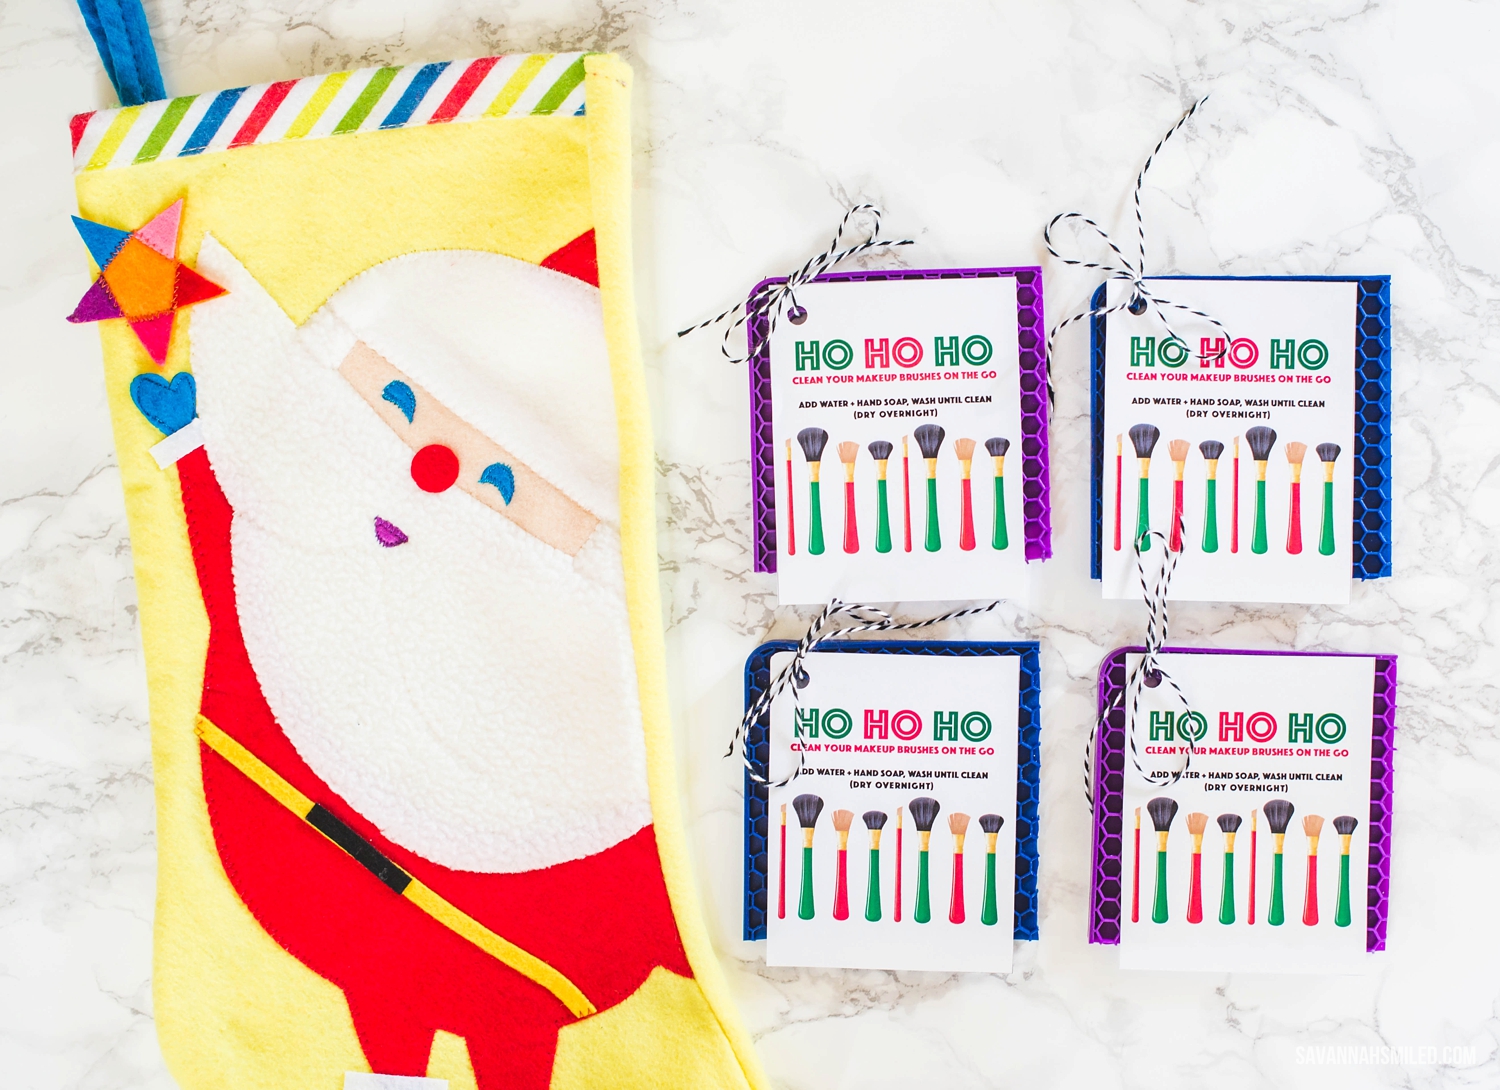
SUPPLIES | Ho Ho Ho Tags, Ribbon/String, Silicone Trivet, Scissors and a Hole Punch
Once you design your tags using GraphicStock images (or have download mine), print them out on cardstock paper. Any paper will do, but cardstock or something thicker will make it a little more tough in the stocking, preventing any easy rips. Cut these tags out and add a hole punch in the upper left corner.
To make my trivets a little more stocking-sized, I chose to divide it by 4 and cut it into quarters. This made each makeup mat about the same size as my tags. Small and portable!

Once cut, add a hole punch to the trivets by aligning a tag as a guide. Once both the tag and trivet are punched, tie a bow with your ribbon or string to connect them together. Then, they're ready for the ladies' stockings!
* If you need a little help with graphics, like I do, try out GraphicStock for FREE for 7 DAYS. This trial includes downloading up to 140 images, so you can really kickstart designs for all kinds of projects during the holiday season. After the free week, your subscription turns into the monthly plan, so remember to cancel if GraphicStock isn't for you.
Let me know if you make these fun stocking stuffers for yourself, or design something completely new with GraphicStock. Have so much fun getting creative this Christmas!